Authorizing an OAuth2.0 App
OAuth2.0 is a widely-used authorization standard that allows applications to securely access data from various services without exposing user passwords. Many data sources that you'll connect to Geodesic use OAuth2.0 for authentication and authorization.
This guide will walk you through setting up OAuth2.0 credentials in Geodesic to connect to protected data sources.
Understanding OAuth2.0 Basics
OAuth2.0 works by issuing access tokens that applications can use to make API requests on behalf of users or applications. These tokens are temporary and must be refreshed periodically to maintain access.
Geodesic supports two OAuth2.0 authorization methods:
1. Client Credentials Grant
- What it is: A simple username/password approach using app credentials
- How it works: Exchange a Client ID and Client Secret for an access token
- Best for: Server-to-server communication, automated processes
- Limitations: May have restricted permissions compared to user-authorized access
2. Authorization Code Grant (Recommended)
- What it is: User-authorized access that delegates specific permissions
- How it works: User logs in and authorizes your app, creating a refresh token for ongoing access
- Best for: Accessing user-specific data with proper permission scoping
- Advantages: More secure, access is limited to what the user has authorized
Choosing the Right Grant Type
| Use Client Credentials When: | Use Authorization Code When: |
|---|---|
| The service only supports client credentials | The service supports both methods |
| You need automated, unattended access | You need access to user-specific data |
| The data doesn't require user permissions | You want the most secure option |
| The service documentation recommends it | You need fine-grained permission control |
Recommendation: Use Authorization Code Grant whenever possible for better security and more granular access control.
Setting Up Client Credentials
Follow these steps to create OAuth2.0 credentials using the Client Credentials Grant:
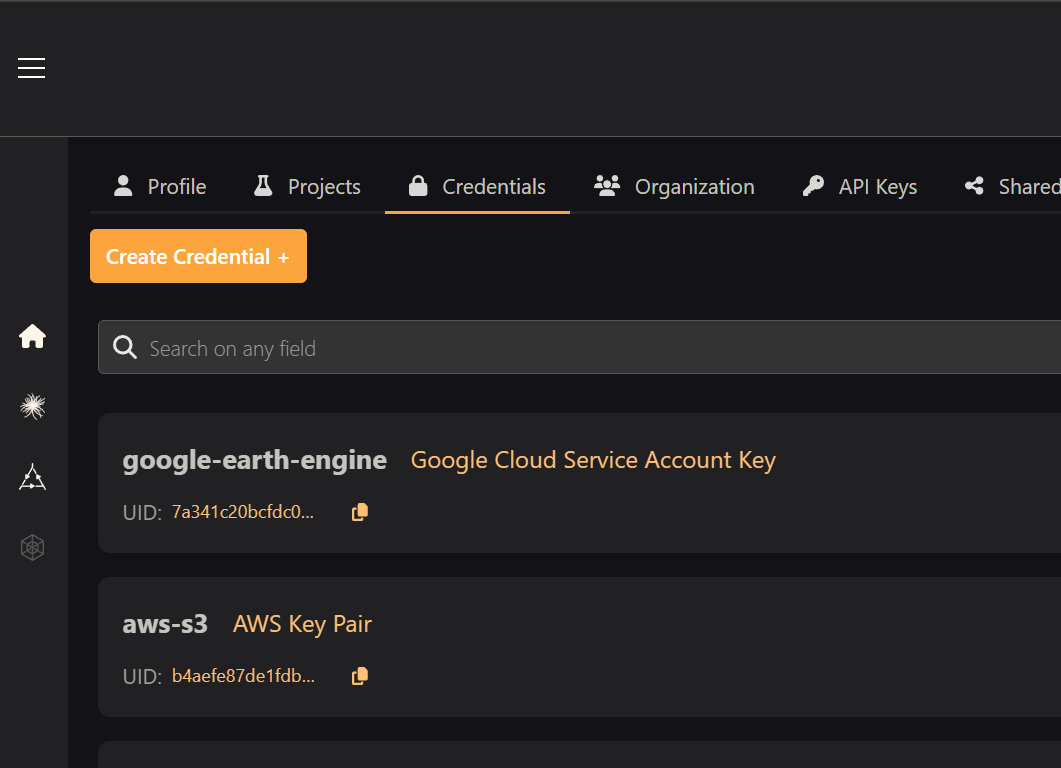
Step 1: Start Creating a New Credential
Navigate to the Settings page and click "Create Credential".
Step 2: Open the Create Credential Modal
This will open the Create Credential dialog where you can configure your OAuth2.0 settings.
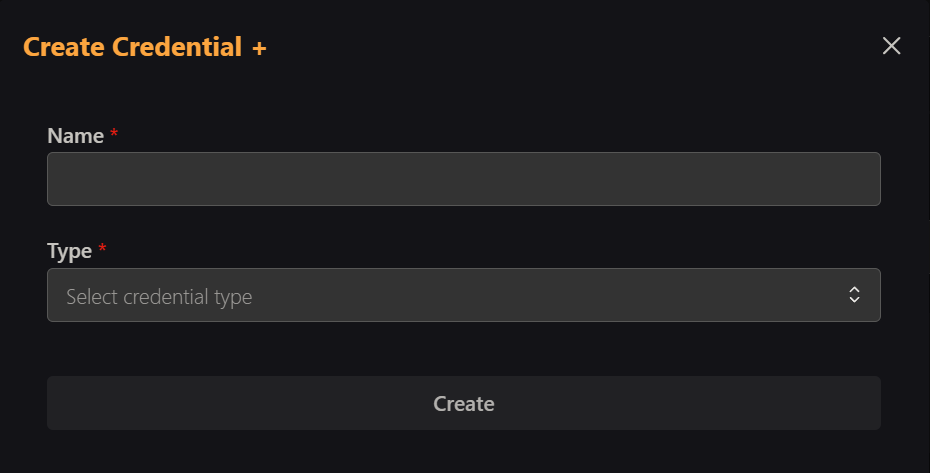
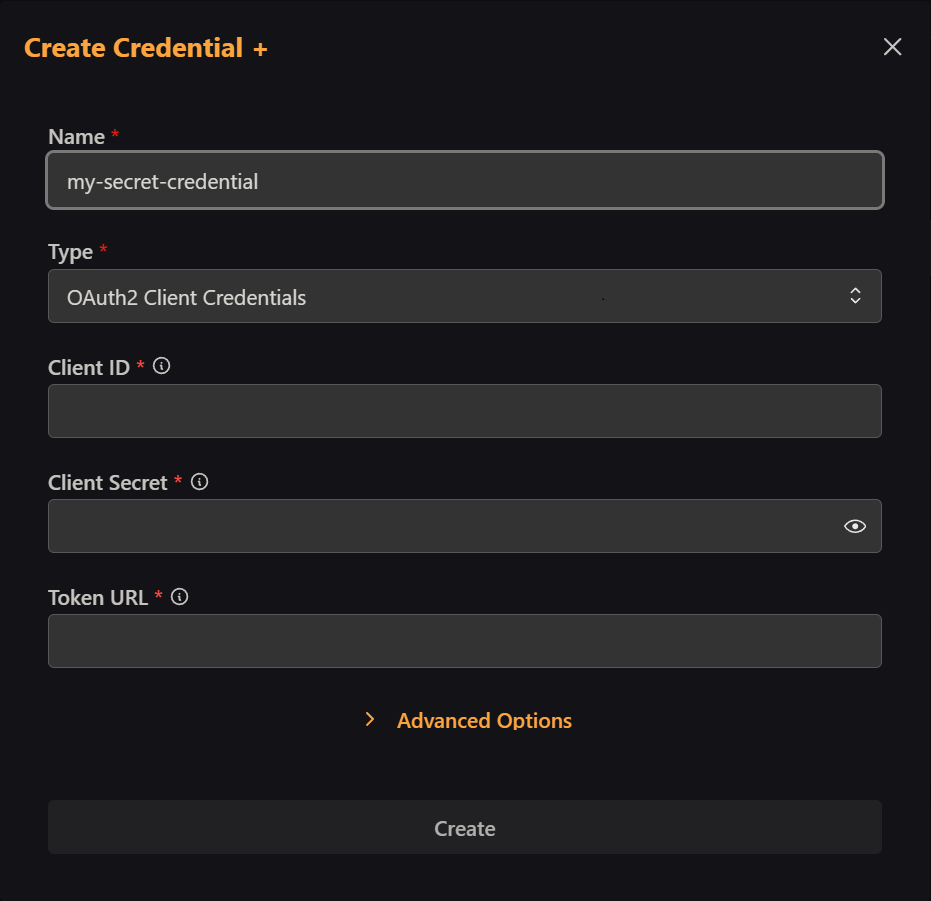
Enter a descriptive name for your credential (you'll use this to reference it later) and select "OAuth2 Client Credentials" from the dropdown list.
Step 3: Configure Your OAuth2.0 Settings
Fill in the following required fields:
- Client ID: Your application's unique identifier
- Client Secret: The secret key for your application
- Token Exchange URL: The endpoint where tokens are requested
Optional Settings:
- Scopes: Space-separated list of permissions your app needs (e.g., "read write admin")
- Audience: Required by some providers to specify the intended recipient of the token
Finding OAuth2.0 Information These values are typically found in your OAuth2.0 provider's developer console or application settings page. Look for sections labeled "OAuth2.0", "API Credentials", or "App Settings".
Step 4: Save Your Credential
Click "Create" to save your credential. If you encounter any errors, double-check your entries and ensure all required fields are correctly filled.
Setting Up Authorization Code Grant
This method provides more secure, user-authorized access to data sources.
Step 1: Start the Authorization Process
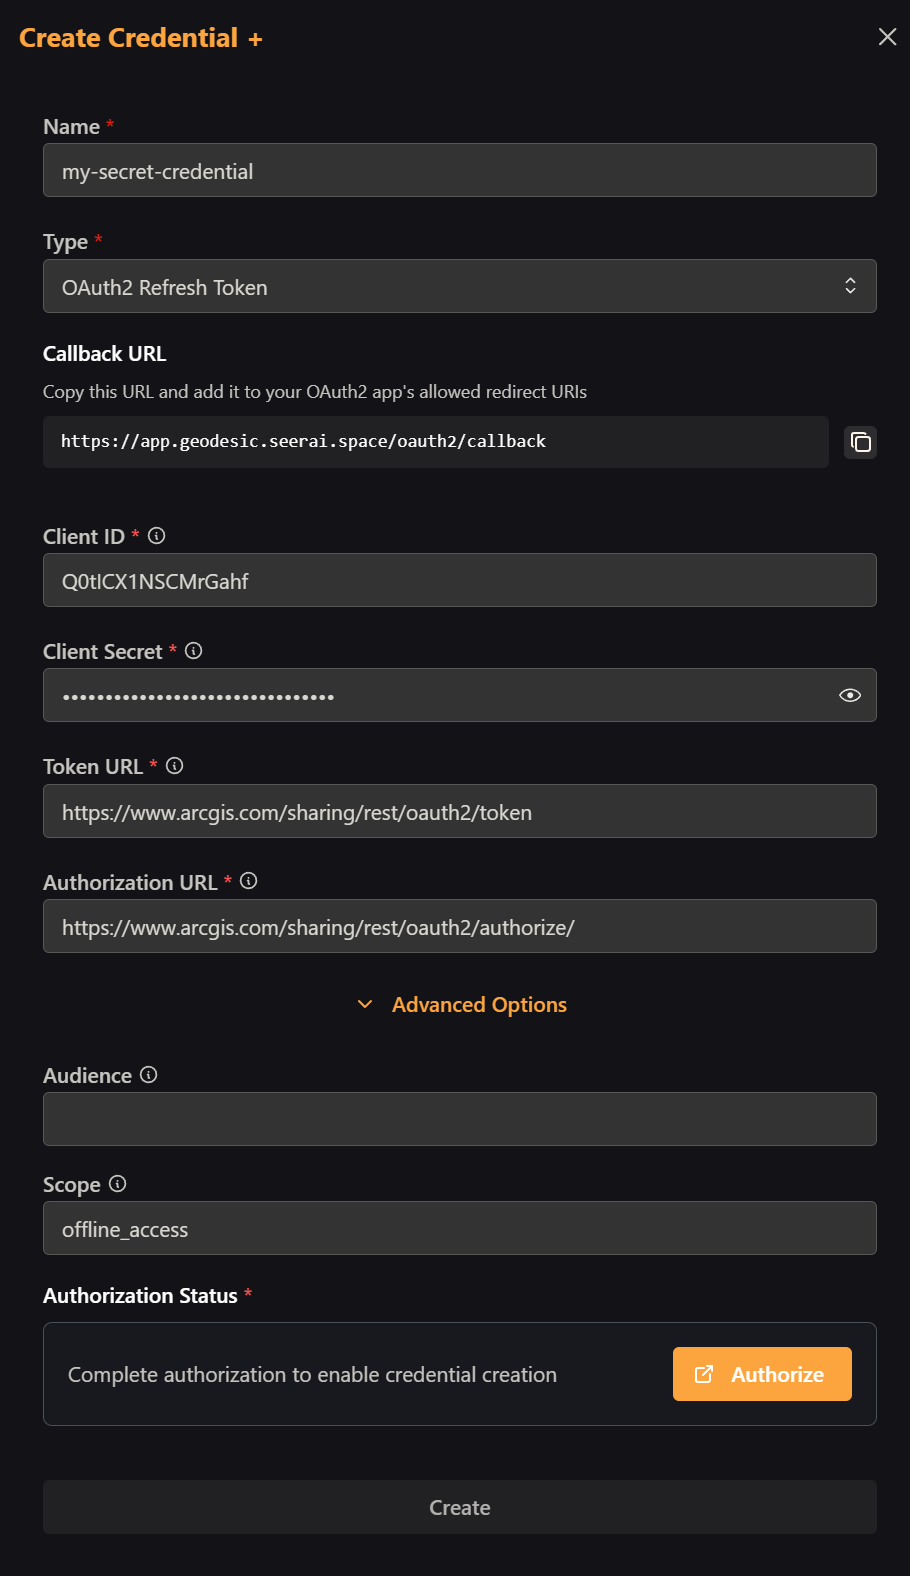
Follow Steps 1 and 2 from the Client Credentials section, but select "OAuth2 Refresh Token" instead.
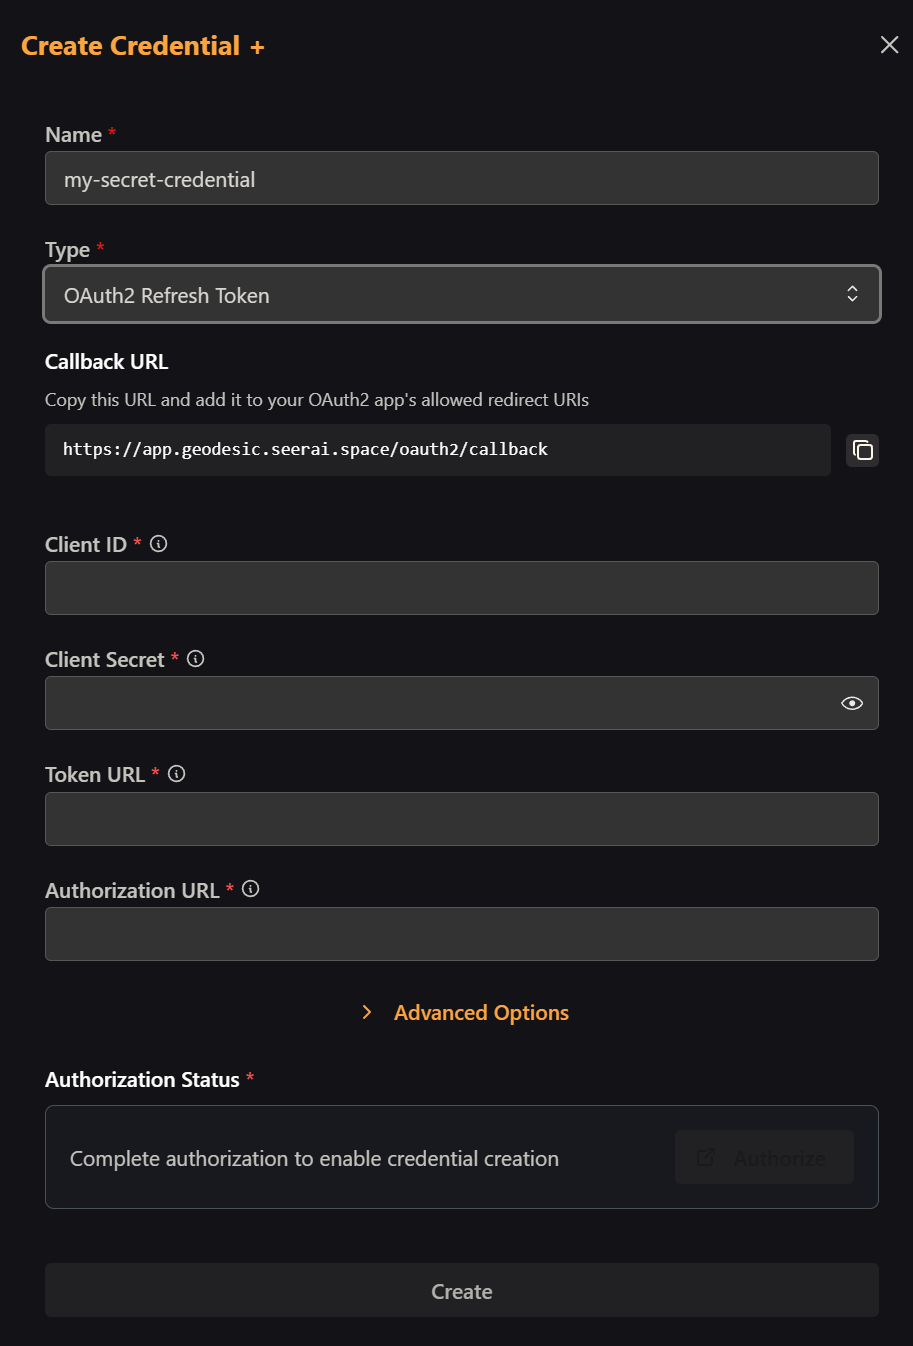
Step 2: Configure Callback URL
Copy the "Callback URL" shown in the modal. You'll need to add this URL to your OAuth2.0 application's allowed callback URLs in your provider's settings.
Important Step This callback URL configuration is crucial. Without it, the authorization process will fail. The exact location of this setting varies by provider, but look for "Redirect URIs", "Callback URLs", or "Authorized Redirect URIs" in your app settings.
Step 3: Configure OAuth2.0 Settings
Fill in the same fields as the Client Credentials method:
- Client ID and Client Secret
- Token Exchange URL and Authorization URL
Advanced Options:
- Scope: Notice "offline_access" is included by default - this allows refresh tokens for most providers
- Audience: Only required by some providers
About Scopes
offline_access: Enables refresh tokens (required by most providers)- Other scopes depend on your specific use case and provider
- Some providers prohibit certain scopes - check your provider's documentation
Step 4: Authorize the Application
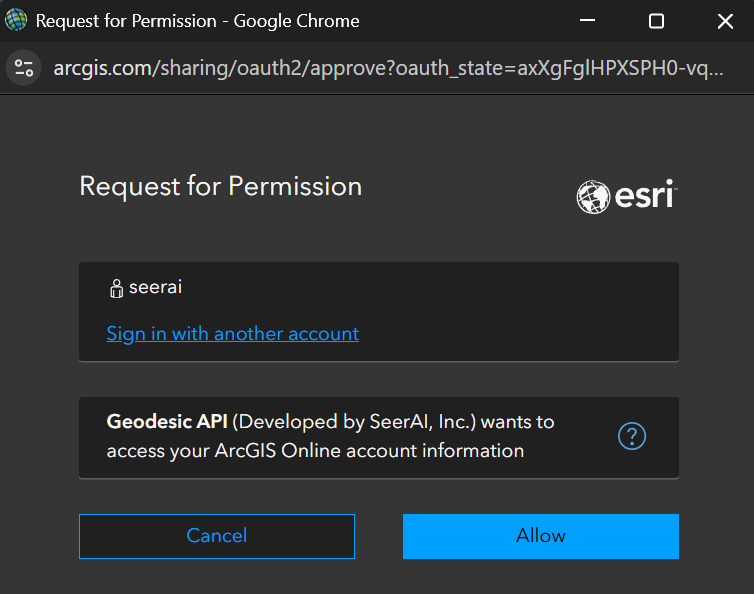
Click "Authorize" to open a popup window that will take you to your OAuth2.0 provider's login page.
- Log in with your credentials
- Review the permissions being requested
- Authorize Geodesic to access your account
Step 5: Complete the Setup
After successful authorization, the "Authorize" button will turn green, indicating the process was successful.
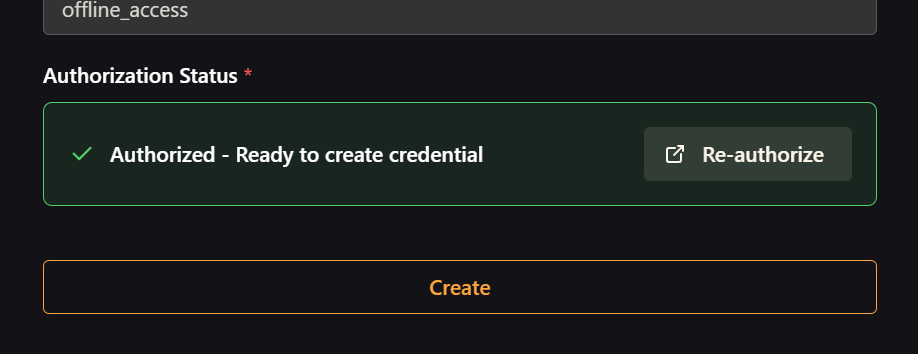
Click "Create" to save your new credential.
Troubleshooting Common Issues
Authorization Fails
- Check callback URL: Ensure it's correctly configured in your OAuth2.0 app settings
- Verify scopes: Some providers have specific scope requirements or restrictions
- Review app permissions: Make sure your OAuth2.0 app has the necessary permissions enabled
Token Refresh Errors
- Refresh token expiration: Some providers limit refresh token lifetime - you may need to re-authorize
- Scope changes: If you modify scopes, you may need to re-authorize the application
- Provider limits: Some services limit the number of refresh operations
Connection Issues
- Double-check URLs: Ensure Token Exchange and Authorization URLs are correct
- Network restrictions: Verify that Geodesic can reach your OAuth2.0 provider's endpoints
- Provider status: Check if your OAuth2.0 provider is experiencing service issues
Security Best Practices
- Use Authorization Code Grant whenever possible for better security
- Limit scopes to only what your application actually needs
- Regularly review and rotate credentials when possible
- Monitor usage to detect any unauthorized access
- Keep credentials secure - never share Client Secrets or expose them in client-side code
Next Steps
Once your OAuth2.0 credentials are configured, you can use them when adding data sources that require authentication. The credential will appear in dropdown menus when configuring datasets that support OAuth2.0 authentication.