Adding A GeoParquet Dataset
Problem
You want to use Boson to connect to a data source which is available as a geoparquet file.
Solution
In this example, we will be using a portion of the Microsoft Building Footprints dataset. This dataset contains the building footprints as features for over 1 billion buildings worldwide. We will just be using a small subset of this data to demonstrate how to add a geoparquet dataset to Boson.
For the purposes of this demo, we have a copy of one geoparquet file covering Vatican City, saved to a public bucket at gs://geodesic-public-data/ms-building.parquet but you might want to copy this file to your own cloud storage (e.g., S3 or Google Cloud Storage) to better replicate your use case. If you want to do this, you can easily substitute the url in the examples with your own cloud storage url.
Setup
First to do some initial setup. We start by importing geodesic:
import geodesic
If you haven’t yet, you will need to authenticate geodesic using the following command:
geodesic.authenticate()
This process is covered in more detail in the Quickstart Guide.
We need to set the active project to ensure that our dataset is saved to the correct project. We do
this using the uid of our desired project. If you do not know the uid, you can fetch a dictionary of
existing project that you can access by running geodesic.get_projects(). Once you have the
uid, you can set your active project like so:
geodesic.set_active_project('cookbook-examples')
Creating The Provider
The geodesic python API provides a method, geodesic.Dataset.from_geoparquet() which makes
adding a CSV dataset extremely straightforward. To add our population centers dataset, we simply run:
ds = geodesic.Dataset.from_geoparquet(
    name='buildings-vatican',
    url='gs://geodesic-public-data/ms-building.parquet',
    expose_partitions_as_layer=True,
    return_geometry_properties=True
)
ds.save()
This will create the dataset and save it in the active project. The expose_partitions_as_layer parameter controls whether the bounding box of the partitions in the parquet dataset should also be created as a separate collection in the dataset. This can be useful for quickly visualizing the spatial distribution of the partitions in the dataset. The return_geometry_properties parameter can be used to tell Boson to calculate properties of the geometries in the dataset such as the area, length, and number of vertices. We will set both of these to True for this example and explore them further down.
Note
The URL to a geoparquet file or set of geoparquet files must end in the file extension .parquet. Even if it is just a root prefix that points to many files, the URL must end in .parquet. An example of this might be if you have geoparquet files in hive partition format that are organized into several subdirectories. To have Boson create a dataset that uses all parquet files, make sure to point to the root prefix of all files and that root prefix must end in .parquet.
In this case, the root URL is gs://geodesic-public-data/ms-building.parquet which contains a subdirectory RegionName=VaticanCity which in turn contains quadkey=120232221 which contains the actual parquet file we are adding. In the full dataset there are many more subdirectories which contain many parquet files.
Testing The Provider
Now to run a quick test to ensure that the provider is working. Let’s search run a simple search to check that features are returned
ds.search()
This should return just one feature as by default it will search the first collection which will be the partitions layer in this case. If you are running in a jupyter notebook, this should appear in a widget like so:
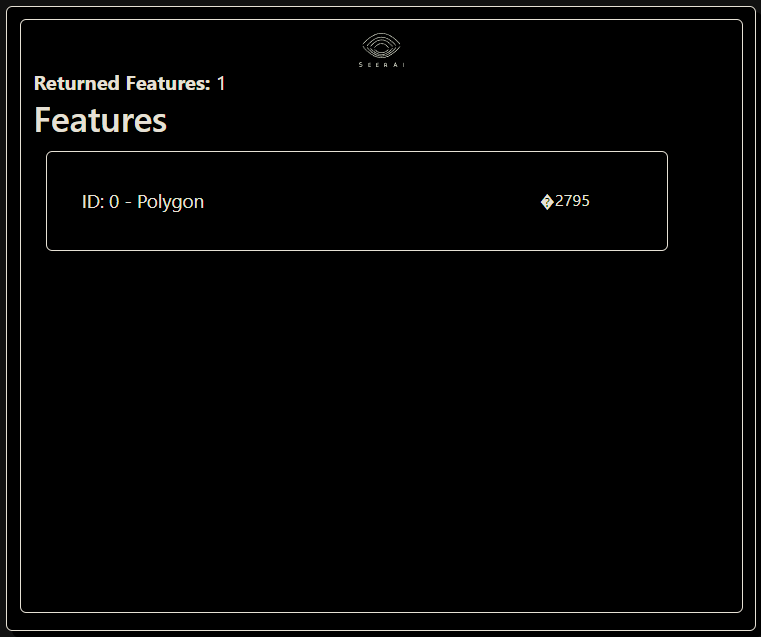
If you are missing the dependencies required to generate the jupyter widgets, or are not running in a notebook at all, the ds.search() method will return a dictionary containing the same information.
Lets take a look at what collections are available in the dataset using the dataset_info method:
ds.dataset_info()['collections']
This should return a list of collections in the dataset:
[{'id': 'partitions',
    'title': 'Partitions',
    'description': 'count of features in each of the partitions of the underlying parquet dataset',
    'license': 'unknown',
    'extent': {'spatial': {'bbox': [[-180, -90, 180, 90]]},
    'temporal': {'interval': [None, None]}},
    'links': [{'href': 'https://api.geodesic-test.seerai.space/boson/api/v1/proxy/dataset-info/buildings-vatican.99135fa2be5a599b14ccfa1b1d8e00db44fdab3f/collections/partitions',
        'rel': 'self',
        'type': 'application/json',
        'title': 'partitions'}],
    'stac_version': '',
    'stac_extensions': None,
    'providers': [],
    'summaries': {}},
{'id': 'buildings-vatican',
    'title': 'buildings-vatican',
    'description': '(no description)',
    'license': 'unknown',
    'extent': {'spatial': {'bbox': [[-180, -90, 180, 90]]},
    'temporal': {'interval': [None, None]}},
    'links': [{'href': 'https://api.geodesic-test.seerai.space/boson/api/v1/proxy/dataset-info/buildings-vatican.99135fa2be5a599b14ccfa1b1d8e00db44fdab3f/collections/buildings-vatican',
        'rel': 'self',
        'type': 'application/json',
        'title': 'buildings-vatican'}],
    'stac_version': '',
    'stac_extensions': None,
    'providers': [],
    'summaries': {}}]
As you can see there are 2 collections in the dataset. The first is the partitions collection which contains the bounding boxes of the partitions in the parquet dataset. The second is the buildings-vatican collection which contains the actual building footprints.
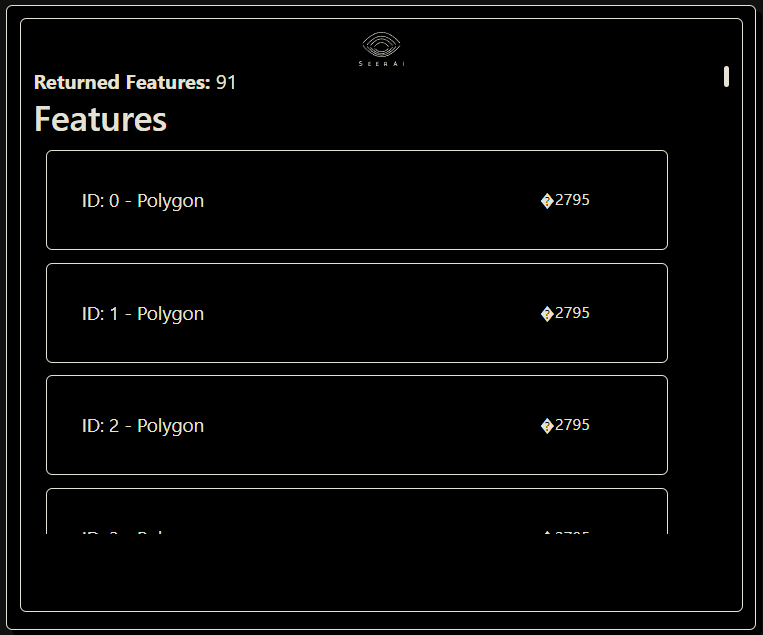
Now let’s search the buildings features by specifying the collection we want to use.
ds.search(collections=['buildings-vatican'], limit=None)
Setting limit=None will return all the features in the collection. Be careful with this option as it can return too many features for very large datasets. You can also specify an integer to limit the number of search results returned. In this case we get back all 91 features.
You can expand the individual features on the list to check that the correct data fields are included:
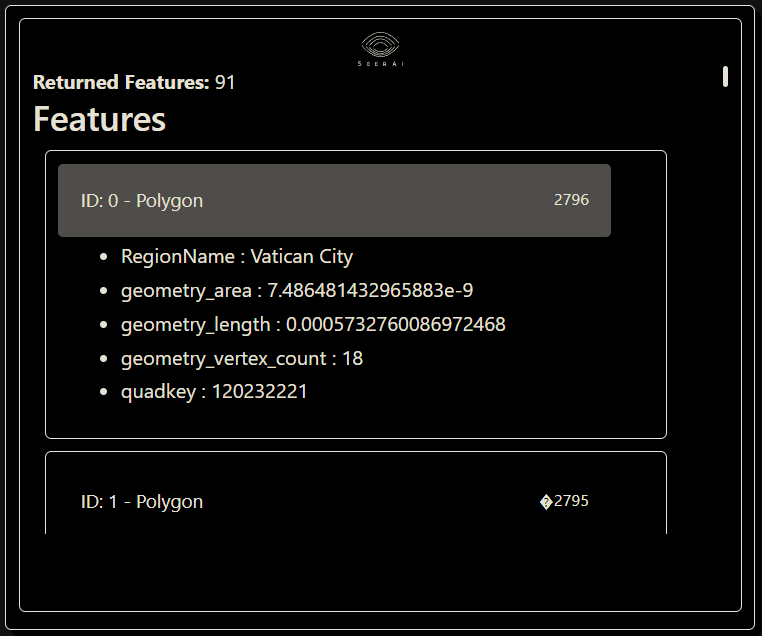
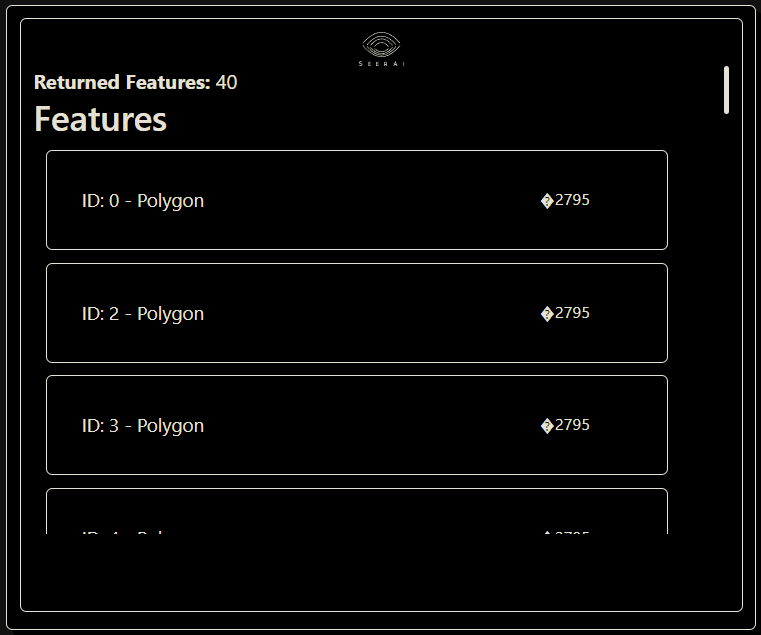
Notice here that we have several properties associated with the geometry such as geometry_area, geometry_length, and geometry_num_vertices. These are the properties that were calculated by Boson when we created the dataset and set the return_geometry_properties parameter to True. These properties can be useful for quickly sorting and filtering features based on the size and shape of their geometries. Let’s take a look at how we can use these properties to filter the dataset.
from geodesic import cql
feats = ds.search(
limit=100,
collections=['buildings-vatican'],
filter=cql.CQLFilter.logical_and(
        cql.CQLFilter.lte('geometry_area', 7.0e-8),
        cql.CQLFilter.gte('geometry_area', 7.0e-9)
    )
)
feats
Here we are searching for buildings whose geometry area falls within a specific range. This should return 40 features:
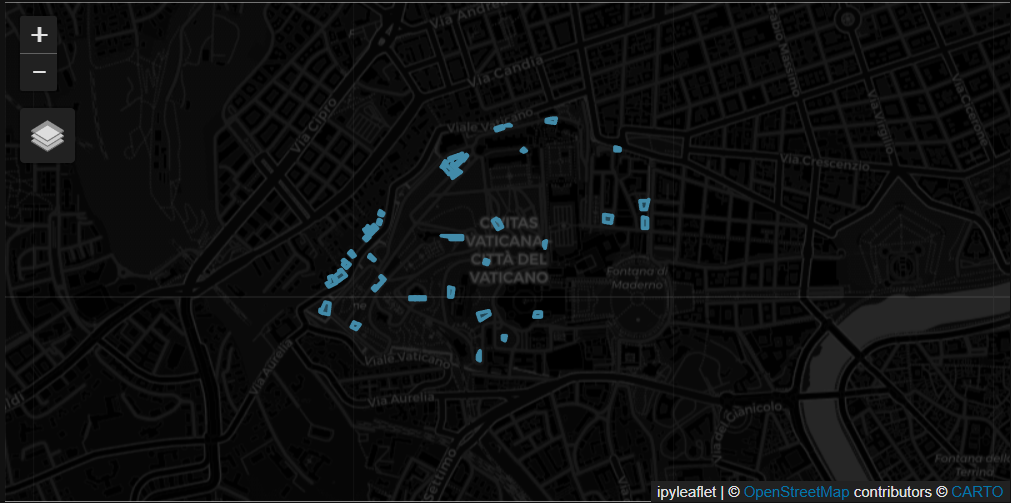
Finally, if you have installed the relevant dependencies, you can use the geodesic mapping utilities to visualize these features on a map using the following lines:
from geodesic import mapping
m = mapping.Map(center=[41.90349079682062, 12.456040222546683], zoom=15)
m.add_feature_collection('Vatican City', feats)
m
We have set the center and zoom level here to focus on Vatican City. If you dont set these you can always navigate the map to the correct area. This should display a map with our 40 filtered buildings.